My lovely blogland friends

Showing posts with label alcohol inks. Show all posts

Sunday, 28 May 2017

Anything Goes at We Love 2 Create

Good moring folks, I've been having a play with my PanPastels and paints to make this journal page for our 'Anything Creative/Mixed Media Goes' challenge over at We Love 2 Create. As usual there are some lovely crafty goodies for our lucky winner thanks to our sponsors Premium Craft Brands and of course there's Top 3 honours up for grabs too!

I wanted to create the look of weathered copper for this page so mixed lots of  beautiful PanPastels quite randomly for my base layer (you can find links to the colours I used at the bottom of this post). Next I mixed some copper acrylic paint with Glassy Gel Medium and applied through a stencil. Once that was dry I applied a bit more PanPastel and then wiped most of the colour off the stencilling. Glassy gel medium is about the only thing I've found that gives a good resist effect with PanPastels.


It kind of started to go wrong from this point as I decided to add some of the beautiful Steampunk Cogs from Stamperia. I've never used these before and they are so lovely but they are on rice paper which I thought would kind of disappear like tissue does. Unfortunately it doesn't! I carefully tore around the images and applied with matte medium and was left with a white feathery border around the image  - not the look I was after at all so I just kind of went over them with PanPastels to try and blend them in a bit. I'll have to remember to cut the images out of the rice paper next time.

I dabbed versamark ink here and there and used some WOW Verdigris EP  to create some more weathered texture, I love this stuff, it looks fab in real life.

The butterfly is from Chocolate Baroque, stamped with versamark on acetate and them embossed with WOW Copper EP. I cut the butterfly out and coloured the back with alcohol inks. I used silicone glue to give the butterfly a bit of dimension.

I'm entering this project in the following challenges:

A Inky Mess: Anything Mixed Media Goes
Dream Valley: things with wings
Let's craft and Create: make your own background
WOW Embossing Powders: anything goes with WOW EPs

Thanks so much for visiting today, hope to see you again soon
Claire xx

Thursday, 1 September 2016

Gifts at Eclectic Ellapu

Good morning folks, it's time for our new challenge at Eclectic Ellapu and this month the Pink Team's theme is 'Gifts' so you can make a gift, use an image with a gift or as I've done use a gift . I've used an empty bottle to create my project and had lots of messy fun altering it.


I began with a coat of matte medium and then applied lots of rock candy crackle paint and a sprinkle of glamour dust. Once that was dry I dripped on alcohol inks in shades of blue and green. I stamped the images using Lavinia stamps and blue versafine ink onto tissue paper and adhered it to the bottle using more matte medium. I glued some pearl string around the image.


I used ribbon to cover the top of the bottle and used hot glue to attach a sparkly door knob to the top of the bottle. To finish off I've added a beaded tassel, some more pearls and a pretty button.

I'm entering this project in the following challenges:

Deep Ocean: things with wings
Fussy and Fancy: Let's fly away
My time to craft: something that flies
Simon Says Stamp: Anything goes
Sweet Stampin: no designer paper
That's Crafty: Get cracking

Thanks so much for visiting today, hope to see you again soon
Claire xx

Friday, 6 May 2016

Steampunk Fish from Chocolate Baroque

Good morning folks, well it feels like Spring is finally here at last! Blue sky and sunshine always makes me feel so much better. I'm sharing a mixed media project made using Steampunk Funky Fish from Chocolate Baroque. The DT are showcasing some of their old favourite stamps and have lots of inspiration to share so it's well worth a visit to the Chocolate Baroque Blog.  I'm a huge fan of steampunk and had the idea of creating a porthole effect looking out onto the fish swimming in the ocean.


To create my sea for the centre of the port hole I inked my brayer up with turquoise dye in and rolled it over crumpled paper before brayering some white glossy cardstock to give the dappled effect of light shining through water. I stamped the images on white glossy card with versamark and embossed with a sparkly gold embossing powder and coloured with distress markers. I cut the fish out and glued them to the sea and set them aside to dry while I made the background and the porthole.


The background was made using some silver self adhesive tape from a local DIY shop, I've no idea what it's used for but apparently plumbers use it. I had a better use in mind though and set to snipping random shapes to create the 'faux riveted metal' technique. I haven't used this technique for ages as it does take a while but it's great fun! 

Next I peeled off the backing from the silver tape and stuck the shapes at random on some white card until it was covered (except for the area where the porthole was going to be positioned). To create the texture of the rivets you can use various different tools to create different effects, I used a ballpoint pen, an embossing tool, an old credit card and and a prpelling pencil. I created dots and lines along the borders of the pieces of tape. Once I was happy with the texture I coloured the silver tape with alcohol inks using shades of brown, yellow and orange. Next I applied some verdigris embossing powder. I gave some die cut cogs the same treatment and attached them to the background, adding some metal embellishments from my stash.


I made the porthole by die cutting some greyboard and painting with a mixture of gold and copper acylic paints. I added some 'screws' with tiny circles of card and a fastener from my stash.


To finish off I've added some more embellishments coloured with paint and some copper ribbon to hang the project up.

613 Avenue Create: Anything goes, twist beach/nautical
Altered Eclectics: Anything goes
Critters and creatures: always anything goes with a critter/creature
Fab'n'Funky: 3 or more layers
Little Red Wagon: anything but a card
Rhedd's Creative Spirit: anything goes

Thanks for visiting today,
Claire xx

Sunday, 11 October 2015

Changing Seasons at Fashionable Stamping Challenges

Hi there, how is your weekend going? We're having some lovely weather here in my little corner of the UK, its been so warm and sunny that its hard to believe its Autumn but the leaves are beginning to turn and the nights are turning chilly. Over at Fashionable Stamping Challenges, our theme this time around is 'Changing Seasons', chosen by yours truly! You've got a month to enter to be in with a chance of winning a $20 voucher to spend at Flonzcraft but don't forget we're a stamping challenge (no digis allowed)  so ink up those rubber/clear stamps and play along.


For My DT card I've used a couple of my favourite stamps from Art Nouveau Silhouettes large stamp sheet (a real bargain as you get 8 really good sized stamps from $16.99!
I've stamped them onto acetate and attached them to some card coloured up with alcohol inks using some pretty brads. The papers, little faux postage stamps, postcard and sentiments are all from Graphic 45, they've been distressed with Gathered Twigs distress ink and layered up on kraft card.  I've added lace, dark green seambinding topped with a button behind the images/

I've adde some paper flowers, pine cones, berries and lots of leaves. I made the leaves using Justrite stamps which I stamped onto a masterboard made with alcohol inks on glossy card, I cut the leaves out, die cut a few more leaves from my masterboard and scrunched them all up a bit before popping them on my card. 


Here's another pic of the images, I love these glamourous ladies. I certainly don't look as elegant when I walk my dogs lol.


I'm entering this card in the following challenges:
Crafting by Designs: All about Autumn
Cut it up: Back to nature
Frillie and Funkie: Autumn splendour
Fussy and Fancy: autumn colours
Mod Squad: get your 'Fall' on
My time to craft: autumnal colours
Wags'n'Whiskers: use a die cut

If you've got time, pop over to the challenge blog and check out my teamies inspiration. As always they've created some gorgeous artwork
Thanks so much for visiting today
Claire xx

Sunday, 9 August 2015

Seaside or On the beach at Fashionable Stamping Challenges

Hi there my lovelies, here's my project for our 'Seaside/On the beach' challenge over at Fashionable Stamping Challenges. Its not quite finished but I got kind of stuck so it will have to wait a wee while until I decide what else to add. As always we've got a fab prize for our random winner (a $20 voucher from Flonzcraft) and Top 3 honours up for grabs too! We are a stamping challenge though so no digi stamps are allowed.


I've had this boat shape shelf for years so decided to give it a bit of a makeover. I've painted the outside with gesso and then lots of different acrylic paints and stamped with a text stamp using Potting Soil Archival ink before I sanded it for a distressed look. Next came some stencilling with Maimeri Glassy Gel and a Crafters Workshop stencil, you can't see it too well on the pic. I added a little gilding wax here and there around the edges too.


An ideaology frame fitted this Chocolate Baroque Sentiment a treat, I added a little more gilding wax too. The beach huts are from Chocolate Baroque, coloured with Distress Markers and Derwent pencils. I coloured the shelf with PanPastels and added shells and a straw hat embellishment.


The middle shelf was made by creating a PanPastel background and cutting some wave shapes from white card. I coloured them with Pans and added white glue and glitter. I stamped the image (Santoro Stamps) and coloured her with my Graph'it markers before carefully cutting her out and layering her and the waves up with ginormous blobs of silicone glue for some dimension.


I've added some fishing net, shells and a message in a bottle that I'd crackled and coloured with Alcohol Inks.

The lower shelf is under the sea and again created a background with PanPastels, stamped the undersea border from Chocolate Baroque and coloured with Derwent pencils. The mermaid is also from Santoro stamps, she's been coloured with Graph'it markers and cut out before layering her up with more silicone glue. I've added some muslin fabric,shells and pearls to this layer.


I'm entering this project in the following challenges:

Allsorts: Inspired by summer
Altered Eclectics: Anything goes
Alphabet Challenge: M is for mermaids
Craft Stamper Take it Make It August Challenge: take a technique, pens and pencils
Deep Ocean: summer fun
Fussy and Fancy: Lazy summer days
Our Creative corner: summer holiday

Right I'd better get my thinking cap on as I think I still need to add some more embellies, maybe some bunting? Or a bucket and spade? Decisions decisions lol
Thanks for visiting today, if you have time do pop over and see my DT sisters gorgeous projects! They are such a lovely talented bunch they're bound to inspire you
Claire xx

Sunday, 17 May 2015

Old Favourites at Fashionable Stamping Challenges

Good morning my lovelies, its time for a new challenge over at Fashionable Stamping Challenges and our theme this time around is 'Old Favourites' so we want you to use your old favourite stamps! We've got a fab prize up for grabs, our lucky winner will receive a $20 voucher from our lovely sponsors Flonzcraft. Don't forget though, we're a stamping challenge so you have to use rubber/clear stamps to enter, no digi stamps allowed!

For my DT project, I've altered a bottle and used some of my old favourite stamps, the stamps used are from Butterfly Poppy Collage, an a4 stamp set from Chocolate Baroque.


I began by coating my bottle with Maimeri Matte Gel Medium, once that was dry I applied Rock Candy Crackle paint and left it to dry.I coloured the crackled bottle with alcohol inks and applied silver gilding wax to the edges. I gave it all another coat of Maimeri Matte Gel and while it was wet sprinkled on some glamour dust.

I die cut loads of flowers from crinoline fabric and some white polkadot tulle. I coloured the fabric with distress reinkers and layered them up, adding buttons in the centres. I used ribbon around the top and added some pearl trim.


The butterflies were stamped on acetate with versamark and embossed with white embossing powder. I stuck the butterflies on double sided adhesive sheet and then glittered the back before cutting them out and attaching them with silicone glue.

I'm entering this project in the following challenges:

Allsorts: no squares allowed
Crafty Cardmakers: make your own  background
Decorate to Celebrate: anything goes
Deep Ocean: flowers
Retro Rubber: May flowers

Thanks for visiting today, hope to see you again soon
Claire xx

Saturday, 7 February 2015

Sketchy new stamps from Chocolate Baroque

Good afternoon folks, I'm back to share a canvas made using some of this months new releases from Chocolate Baroque. I've used some of the flowers, leaves and dragonfly from Sketchy Doodle Landscapes and had a lot of inky fun creating this project.


I began by spraying the canvas with some spray inks (I used glimmer mists but you could use dylusions or even have a play with brushos for this effect) in shades of green, blue and purple and left it to dry. While it was drying I took some squares and rectangles of plastic from my stash and coloured with alcohol inks in toning shades. I also coloured some acetate with alcohol inks and once that was dry turned it over, dusted with an anti-static bag and then  I stamped the flowers, leaves and dragonfly with versamark. I embossed with WOW gold embossing powder  and then cut them all out.


To assemble my canvas I used PVA glue to adhere the plastic squares and dragonfly  to the background. To fiive the flowers a bit of dimension, I created little 'n' shaped pieces of acetate and used them to pop the flower up, this gives the flowers some movement and also lets light through through acetate to make the colours pop.

I'm entering this project in the following challenges:
Clear it out: anything goes (Stash item Glimmer mists)
Craft your passion: anything goes
Not just cards:  anything goes
Papertake Weekly: anything goes
Rhedd's Creative Spirit: anything goes
Southern Girls: sparkle and shine

Thanks for visting today
Claire xx


Saturday, 12 October 2013

Playing with Thermomorph, you're going to LOVE this stuff!

Good afternoon folks, brrrrrrrr its terrible weather here today - blowing a gale and lashing down with rain .... perfect crafting weather lol! I was really excited when I received an email asking if I'd try an exciting new product called Thermomorph, it sounded fun so of course I said yes and within a few days a lovely big jar of thermomorph arrived. Here's a few bits and bobs I've made trying out different techniques etc. 


Firstly though, I'd better tell you what Thermomorph is and where you can get your hands on some lol. Thermomorph is a plastic compound that melts at low temperature, its available from Amazon here: http://www.amazon.co.uk/ThermoMorph-Polymorph-Shapelock-Plastimake-InstaMorph/dp/B00D3LAZ9O and you can find more details here on the Thermomorph website: http://www.thermomorph.net/. Its usually £19.95 for a 500g jar but I see its currently on offer with £2 off and free p&p. I've tried friendly plastic before and thought this would be very similar and it is BUT its a lot friendlier lol, it is very quick and easy to work with and I didn't burn my fingers once:-)

Now I'd planned on doing some step by step instructions but got carried away and only took a couple of pics so if you need any more info just email me and I'll try and help. I decided to use my Melt pot rather than just a bowl of hot water and it worked a treat, I set the temperature at 80 and it kept the thermomorph and a nice workable temperature. If you let it get too hot, a it'll burn your paws and b it goes a bit stringy so don't overheat it. 


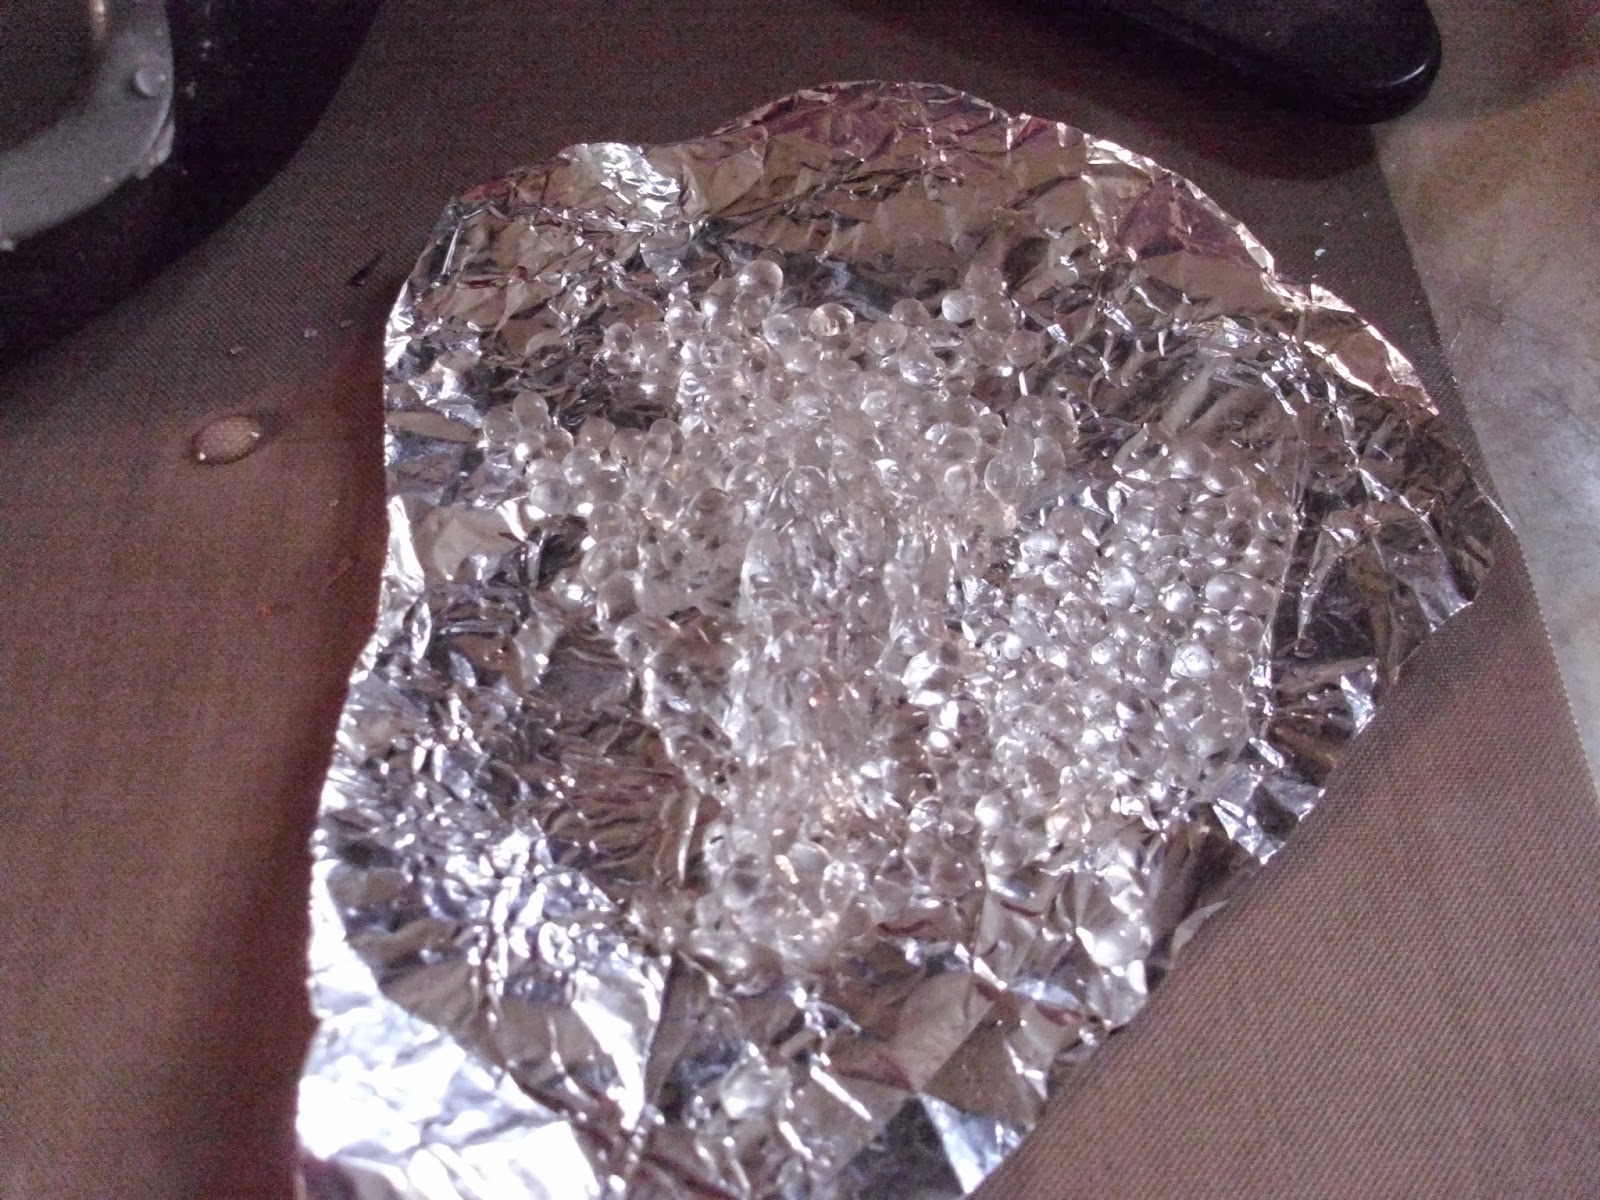
As you can see you get loads of product for your pennies, I've hardly used any and I made a load of little projects. I popped some foil in my melt pot as I was worried it may stick but I didn't need to worry as it didn't stick to anything. Here's a pic of the white thermomorph pellets in the water


In a few minutes they'll go clear and clump together (kind of like frogspawn lol) and then they are ready to work with. I found that when I took it out of the melt pot it was a workable temperature but if you have a go take care not to burn yourself.


Here are some of the pieces I made trying out different techniques:

These are made just by popping the melted Thermomorph in silicone moulds, they set in minutes and once they are white you can remove them easily. As you can see from the large heart, it picked up all the fine detail really well.


These pink roses were made by colouring the white granules of Thermomorph with cranberry alcohol ink before I melted them, I just love the kind of marbled effect of the finished flowers


Next I rolled some melted Thermomorph out and popped it in an embossing folder, once it was cool I die cut it with Sizzix Bigz die and painted with antique linen distress paint.


This next one was made by creating texture with a rubber stamp and cutting with a cookie cutter. Once the Thermomorph was cool I coloured with alcohol inks and added a coat of glossy accents. I love this technique, and was really impressed with the detail that the Thermomorph picked up from the stamp


Next I decided to play with markers, I created some texture with an embossing folder while the Thermomorph was warm and shaped it a little to add some dimension. Once it was cool I added colour with Graph'It markers and then some treasure gold to pick up the detail.


Still experimenting I decided to press the Thermomorph through some lace and cut with a circular cutter. I added some colour with alcohol inks and added one of  my little roses too


Last but not least, two little birds made using Thermomorph in moulds and painting with Maimeri Brone acrylic paint, I adore this effect as they look gorgeous in real life, just like metal embellies!!


Well thanks for persevering, there are so many pics in this post but I really wanted to show you just a few of the different things you can do with Thermomorph.
Enjoy your day and thanks for popping by
Claire xx

Sunday, 16 June 2013

Show Us Something new at FSC

Hi there folks, how's your weekend going? Hope you're having a good un :-) We've got a new challenge starting at Fashionable Stamping Challenges and this time around we want you to 'Show us something new' - some new crafty stash, a new technique .... you get the idea, just remember to include some stamping. Our lucky winner will receive a prize from our fab sponsor Leo at Flonzcraft!


I decided to make a little altered domino book - a first for me as I've never made one before and I'm not likely to make another, these babies are tiny and when you're as blind as a bat and clumsy to boot this isn't the best kind of project to tackle lol. The front and back of the domino were coloured with alcohol inks (lettuce and stream) and stamped with one of the 'Urban Landscapes' stamps from Flonzcraft.

Inside the little concertina bit was made with distress inks (peeled paint and tumbled glass) and then stamped with more of the Urban Landscapes stamps, I did a bit of second generation stamping to add some depth . The birds are a stamp from Chocolate Baroque, I cut the words I wanted from another Chocolate Baroque stamp and popped them on with some wet glue. All going smoothly so far .....


I glued black beads and some green and blue microbeads around the edges with my hot glue gun and also glued on some silver bead caps and black bead feet - smart idea until the dratted thing wouldn't stand up. This is where things started to go horribly wrong, you don't want to see how many beads went all over me,  my desk and the dogs,  hot glue stringy stuff everywhere - not a  pretty sight lol   OMG it took me ages to position the feet so it would stand up. Next I assembled it and then promptly lost it, after a bit of a panic incase Barney had eaten it (he's a lab and eats anything and everything) I found it and broke one of the feet off. Aaaarrrggggh! Anyway hot glue gun to the rescue but of course now the joker won't stand up again!  Talk about a creative journey lol.

I'm entering this project in the following challenges:
Aud Sentiments: anything goes
Creative Card Crew: metal pins/charms etc
DominoArt: anygame goes
Sweet pea stampers: birds of a feather
Totally Papercrafts: feeling blue

Well I think after all that crafty drama i'm going for a lie down lol. Do pop over to the challenge blog as my talented teamies have come up with some fab-u-lous projects to inspire you 
Thanks for popping by
Claire xx

Sunday, 13 January 2013

New Year, New Technique at PanPastel UK

Good morning :-) We've got a new challenge at PanPastel UK and we want to see you use a new technique this time. I love this kind of challenge, it certainly gets the old brain cell working overtime lol. I've really been enjoying playing with the Maimeri mediums from Your Creativity Store and for my new technique I decided to try colouring the gorgeous 'Glassy Gel' with alcohol inks. 


I've made a photo frame, and gone for a masculine colour palette for my project. I used two of the square canvases and began by adding some colour with turquoise tint panpastel and a little tuquoise shade. I mixed the Glassy Gel with some ginger and expresso alcohol ink, and applied through a Crafters Workshop Template. 
I just love working with glassy gel, it really gives a gorgeous effect and I'm chuffed to bits that it takes colour so easily. Once it was dry I added shades of brown PanPastel and stamped on some Stampers Anonymous butterflies and text. I used the same colours on the inside, adding a frame made with my new nesties and a Chocolate Baroque sentiment.


I've used grungeboard hinges, coloured of course with more PanPastels to join the two canvases, adding a little Pebeo Fantasy paint to the hinges. You can see the hinges a bit better in this pic


I'm entering this project in the following challenges:

Crazy Challenge: no designer paper
Inky Chicks: Anything goes
LEJ Designs: something new
Try it on Tuesday: New stash

Don't forget our lucky winner will receive a fabby PanPastel starter kit from the lovely Berni at Your Creativity Store so you don't want to miss out on the change to win!
Thanks for popping by
Claire xx

Sunday, 30 December 2012

Surprise us at FSC!

Hello folks, I hope you're all enjoying the Christmas and New Year break. I've got 9 days off work now so hopefully lots of time for crafting :-)
Back to business as we've got a fab new challenge over at Fashionable Stamping Challenges where our theme is 'Surprise Us'. Our lovely teamie Joanna suggested that we should all make a project to send to one of our DT sisters so next week I'll be posting my project out to ...... nope not telling, that would spoil the surprise lol.


I've altered a little board book box using acrylic paint to create a crackle background, and adding lots of gold embossing. I then made a panel using alcohol inks (wild plum, cranberrry and snow cap) which I stamped with a gorgeous Chocolate Baroque flower stamp and embossed with Gilded Ivory EP. ?Unfortunately my photography skills don't get any better so the photos are pretty rubbish. I added some lace, ribbon and little flowers (from The Funkie Junkie boutique) I made a little brooch to go in the box, using crinoline fabric coloured with the same alcohol inks and white netting, I added a button and stiched some crystals and seed beads around the button centre. Here's another pic which is perhaps slighly better, or maybe not lol. 


I'm entering this project in the following challenges:
C.R.A.F.T: Not a card
Fab'n'Funky: ribbon/lace
Live and Love Crafts: anything but a card
Simon Says Stamp: anything goes
Try it on Tuesday: Lucky Dip (Stamped image and ribbon)

As always our challenge is sponsored by the lovely Marina from Cottage Crafts with a voucher for the lucky winner so don't miss out!  Don't forget though, we're a rubber stamping challenge so no digi stamps allowed :-)

Thanks for popping by today, have a lovely Sunday. If you have time grab a coffee and pop over to visit my DT sisters as they have really come up with some gorgeous creations this time
Claire xx

Saturday, 27 October 2012

Linda's tags number 2

Hi there, brrrrrrrrrrrr I don't know what happened to Autumn but it feels like winter has arrived here in my little corner of the UK, this morning we had a snow shower!!! Its a good job I'm getting ready for Christmas then lol. Here's my second project inspired by Linda's Christmas tags (pop over to Linda's blog to find out more, you can see Tag #2 here and find out the rules here, there are some fab prizes as the challenge is sponsored by Linda's shop The Funkie Junkie Boutique)


As I've decided to make bunting inspired by Linda's tags I've stuck to my gold colour palette but taken inspiration from the techniques Linda has used and the design of her gorgeous tag. I used the Riveted Patchwork techniqe for the background, coloured with espresso and gold alcohol inks. I just love this technique, its soooo much fun to do and I love the finished result

 I've used Crafty Secrets stamps for the centres of the cogs (which are embossed with antique linen distress EP) I die cut the letters on my cricut and embossed with a sparkly red embossing powder. 


The holly sprigs are Molly Blooms stamps, I embossed these onto Ranger foil with gold ep and coloured with Cranberry and Pesto alcohol inks. To finish off I've added a swirly holly die cut, embossed with a sparkly ivory EP.

I'm also entering this one in to the following challenges:
Anything goes: make your own embellishments
Do you stack up: embossing
Fussy and Fancy: anything goes
Holly Jolly: Here comes Santa

Hope you're having a good weekend, I've had a lovely crafty day and now I'm off to put my feet up and watch TV now, Strictly and Merlin tonight so I'm a happy bunny. Thanks for popping by
Claire xx

Saturday, 4 August 2012

Blog Hop at No Matter Which Challenges!!

Hi there, we're all thoroughly over excited to be kicking off No Matter Which Challenges with a fun blog hop and an 'Anything Goes' challenge!! There are some amazing prizes up for grabs so make sure you comment on all the blogs in the hop to be in with a chance of winning

If you've arrived here from Velma's blog you're on the right track, if not hop over to NMW Challenge blog where the fun begins. We've got some really generous sponsors:


Make it Crafty


and last but certainly not least


Well if you've made it this far you're doing well lol. Here's my DT project for our first challenge, 


I won't bore you with too many details, I've used stamps from Chocolate Baroque's 'Key to my dreams' themeplate, lots of distress inks and a little distress EP. I've also had my first play with the ranger adhesive foil stuff I got from the Funky Junkie recently, coloured with alcohol inks and embossed with one of my new embossabilities. I've used a stamped kraft tag as the focal point and added ribbon and a little ideology key. The ribbon frill was a bit of a happy accident as I've got the card more or less finished and realised it didn't quite fit the card blank eeeeeeeeeek!! I quicky coloured some seam binding with distress ink and added a little frill to fill the gap lol. 

I'm entering this project in the following challenges:
4 Crafty Chicks: distressing
Amusing Challenges: Anything goes
Crafting When We Can: monochromatic
Inky Impressions: Embossing

Anyway I hope you're enjoying the hop, your next stop is my lovely teamie 
make sure you start and fnish at the challenge blog and leave some love all the DT s blogs to be in with a chance of a prize!
Thanks for popping by
Claire xx


Related Posts Plugin for WordPress, Blogger...