My lovely blogland friends

Monday, 30 January 2012

Ladybird Ladybird

Hi there, today's card features some of the stunning new stamps released this month by Chocolate Baroque.  When postie delivered these stamps I was blown away as they are fab-u-lous. I adore flower stamps and have loads but as always Glenda has come up with some more 'must have' stamps, you can check them all out here and the new stamps are on offer too so don't miss out. This card was quite a challenge as anyone who knows me will tell you I'm a real bodger and not the neatest stamper so getting this frame right was a bit tricky. It might have helped if I'd been able to find my stamp positioner lol.


I've used the large allium type flower stamps from Fragrant Honeysuckle stamped 4 times to create the corners. I pencilled in a line to give me a guide where to stamp and then just went for it lol. I stamped the images with versamark and embossed with black detail embossing powder.  I used a clear ruler and a fineliner pen to create the frame.

The ladybirds are from the same stampsheet. again embossed with black EP and coloured with tinkabella ink and given a coat of glossy accents. The quote is one of my favourites, from Chocolate Baroque's 'Curly Birds' stamp sheet. It all looked a little plain so I masked off the outer frame and  lightly spritzed red and black mica spray. I matted the finished artwork on red and black card before attaching to an 8"square card blank.

i'm entering this card in the following challenges
Crafts 4 Eternity: clean and simple
Fussy and Fancy: polkadots (on my ladybirds)
Moving Along with the times: blooming marvellous

 I hope you like it, there are some amazing new stamps available from Chocolate Baroque again this month so pop over to the Chocolate Baroque Design Team blog as my talented teamies have some gorgeous projects to share 

Thanks for calling by
Claire xx

Sunday, 29 January 2012

Glitter and Glitz with PanPastels

Good morning folks, here I am bright an early with my DT card for our new challenge over at PanPastel UK Challenge where our theme is 'Glitter and Glitz'. You don't have to use PanPastels to enter the challenge but of course we'd be happy if you did. :-). Apologies in advance for the awful pic, we don't seem to have had any light to get a decent photo for weeks now. 

Now for a change there isn't a lot of stamping on this project. I was playing around with PanPastel colours and loved the combination of  Diarylide Yellow, Ultramarine Blue and Permanent green. My truly horrible photography skills have bleached out a lot of the colour in the pic but in real life these 3 colours are totally scrumptious together, adding the yellow creates a fab lime shade. Anyway the backgrounds were created in a matter of minutes by simply applying the panpastels with a sofft sponge and blending them together.
The focal image was made using a beautiful dreamweaver stencil from my not-so-secret Santa Annie :-).  I  applied creative expressions black glue to the stencil carefully removed it and sprinkled on  Beadazzles in Macarena. I wasn't sure if the black glue would work or not so it was a bit of an experiment lol. The colours haven't shown up to well in the pic but they have a lot of copper in which contrasts beautifully with the greens.  You can't beat Beadazzles for a some serious glitter and sparkle lol. 

I left the tree overnight to dry and to complete my card I added stickles in midnight blue and more beadazzzles (this time attached using red line tape. The butterfly is a stamp from Chocolate Baroque, stamped on acetate and embossed with black and glittered on the reverse. The sentiment stamp is also from Chocolate Baroque.

I'm entering this card in the following challenges:
Drunken Stampers: something new (my new tree stencil)
For your inspiration: Photo inspiration
Gingersnap Creations GC136: Glorious Greens


I do hope you can join us at PanPastel UK this week, our lucky winner will receive a fab prize from our generous sponsor Berni, from Your Creativity Store who is offering a PanPastel Trial Set!


Before I go i'd like to give a big warm welcome to my new followers, its really lovely to 'meet' you all :-) 
Thanks for popping by today
Claire xx


Make it a Guy thing at FSC

Hi there, phew I really struggled with this card for our new challenge over at Fashionable Stamping Challenges. Our theme is 'Make it a guy thing' and as always our lovely sponsor Marina has a fab prize up for grabs. Don't forget we're a rubber stamping challenge so no digi images are allowed.


I find mens cards tricky, and this one was no exception. Its my FILs birthday next week so I wanted to make a card that he would like rather than one I like lol. So the messy inky backgrounds and the steampunk stamps were put away in favour of a more sedate watercoloured scene lol. I've used a stripey bp from my stash and ribbon from crafty ribbons (one is navy blue and one is bottle green although they both look the same on the pic lol). The focal image is a stamp from Sheena Douglass, stamped on watercolour card and painted with distress inks. The sentiment is a Chocolate Baroque stamp, cut out with nesties. I've used dark green and dark blue card to mat and layer but again it doesn't show up too well with my dreadful photography :-)

I'm entering this card in the following challenges:
Celebrate the Occasion: Masculine birthday
Crazy 4 Challenges: layer it on
Marks Finest Papers: at least 4 layers
Simon Says STamp: anything goes
Sisterhood of Crafters: Striped paper

Thanks for calling by, I hope you're going to join us on the catwalk at Fashionable Stamping Challenges and share your masculine creations with us
Hope you have a good Sunday, if it wasn't followed so quickly by Monday mornings it would be my favourite day of the week
hugs
Clairexx


Saturday, 28 January 2012

A taste of the orient

Hi there, I'm late with todays' card, I seem to have had one of those days, you know the ones where everything takes twice as long as usual, your drop everything you pick up lol. Anyway I wanted to share this card which features a gorgeous image from Scrapbook Stamp Society (you can find her here)


I've coloured the image with promarkers and used fineliner pens for her long flowing hair. I wanted to keep the card fairly simple so I made a bp using starburst stains (using shades of lilac, blue and green but the mica makes them look a bit odd lol). Once the card was dry I stamped assorted foliage stamps using black versafine ink. I've used black card to matt and layer and added some black organza ribbon to finish off. I'm entering this card in the following challenges:
Crafts 4 Eternity: Clean and simple
Inspire me Fridays: anything goes
Truly Madly Crafty: anything goes

Thanks for calling by today
Claire xx

Thursday, 26 January 2012

Burn's Night Challenge at Rainbow Lady's Challenge Blog

Hi there folks, Thursday again so time for a new challenge from the lovely Cynthia over at Rainbow Lady's Challenge and this week our theme is 'Burns Night' so we want to see anything to do with Scotland.


For my DT card i've created a brayered scene using my favourite 'Mountain Meadow' Big&Juicy inkpad and stamps from Clarity. I've matted the scene on white card,then black card. The gorgeous tartan backing paper is from Crafty Ann's , the colours are a perfect match for the inkpad and fitted the theme beautifully. 

I'm entering this card in the following challenges:
Craft a Scene: anything goes (with a scene)
Crafty Boots: Inspired by a song title (By the light of the silvery moon)
Let's Ink It Up: anything goes
Stamp & create: anything goes
Victorine Orignals: anything goes

Thanks for popping by today
Claire xx

Tuesday, 24 January 2012

New stamps from Chocolate Baroque

Hi there, today's card share features some of the gorgeous new stamps from Chocolate Baroque. 3 new sets of stamps have just been realeased and they are all fab-u-lous (you can see the stamp sheets here on the Chocolate Baroque DT Blog) 


I've used a backing paper from the Butterfly Bliss CD, and added a little victorian velvet distress ink to pink it up a little. I've used silk coated cardstock to create the scene using the focal image from Rose Tree 3 times in the foreground of the card. I used eclipse masking tape to stamp the central tree before stamping another tree on either side. I masked the sun and added the sky and hills in the background with my brayer and Memento inks (Summer sky, Danube blue, New Sprout and Bamboo leaves). Once the inks were dry I coloured the flowers and leaves on the trees with promarkers and gave it a gentle polish.

The castle in the background is actually a halloween stamp, from Howling Moon stamp sheet.  I inked it up carefully with memento tuxedo black inkto miss out the spooky moon. I added foliage from Wisteria Lane along the top and bottom of the little scene and used a make up sponge to intensify the colour around the trees. As a finishing touch I used the butterfly from Rose Tree, stamped on acetate and glittered on the reverse and popped up with silicone glue to let the glitter sparkle.

Its so rainy and miserable here in the UK at the minute, I hope this card brings a reminder that spring isn't too far away now. 
Claire xx


Sunday, 22 January 2012

Exciting news!!


Hi there,I'm back with my first DT project for Scrapbook Stamps Society. I was over the moon when I was invited to join such an exciting team, the hardest part was choosing the images to work with lol. For my first project I've made a little shadow box using a stunning digistamp by Heather Valentin called 'Butterfly Fae Fantaseyes' (you can find it here). I love to colour eyes so I couldn't resist this image.


I've coloured the image with promarkers and popped it in to the back of a canvas that I'd covered with glimmer misted scrunched paper to create a frame. I inked around the edges with some black versafine ink and added lots of flowers. The large black roses are made from grungepaper painted with Ranger crackle paint and a sprinkle of black glitter. All the smaller flowers started out white and were coloured with glimmer mists. I've added some black punched leaves and some gorgeous glittery green leaves. 
The little heart charm isn't showing too well in the pic, I made it by colouring translucent shrink plastic with green pigment ink and stamping over with a heart stamp before shrinking to size. Its attached with a couple of jump rings. 

The new challenge over at  Scrapbook Stamp Society Challenge  is open and the theme is 'Hearts and Flowers, there are some fab prizes on offer and some gorgeous freebies too

I'm also entering this project in the following challenges:
Crafty Emma's Challenge: anything but a card
Creative Belli: Fancy frames
Hotshot Crafts : Flowers
I love promarkers: anything goes
Sunday Stamper: My eyes adored you 
Totally Papercrafts: Make your own flowers
Through the Craftroom Door: anything but a card plus make your own embellies
Truly Scrumptious: something forgotten 
(my canvas was gathering dust as were the flowers I coloured with glimmer mists)

Happy Crafting
Claire xx


Use 2 of Something at PanPastels

Good morning folks, hope you've got your sunspecs on this morning as my card share today is rather bright lol. Today sees the start of our second challenge over at PanPastel UK Challenge Blog and our theme this time is to use 2 of something. We're really looking forward to seeing your beautiful artwork as we had so many gorgeous entries last week. This is a real change from my card last week which was very muted colours, for this card i've used  Iron Oxide Red and Yellow PanPastels with a little black

I made the background by applying red PanPastel around the edge of the card and yellow in the centre using a large angle sofft sponge and then gradually blended the colours together to graduate them. PanPastels are so velvety they blend perfectly and you can create a background in  literally a couple of minutes.  I then used black PanPastel to stamp the swirls around the border,  when you stamp with PanPastel apply to your stamp using a sofft sponge, they give a really soft and muted effect.

For the main image I used the same PanPastel colours, this time I masked a circle of the yellow before I blended in the with the red. I used a post it note, dabbed onto fabric to get rid of most of the sticky so that it didn't lift the colour. 
The large stamp with the 2 gorgeous birds is from Chocolate Baroque (Woodland Dreams themeplate) stamped with versamark and embossed with black detail EP. I've found that PanPastels are great for embossing on as you don't seem to get any static so no messy specks of powder on your project. 

I've painted the berries with Tinkabella ink, this gives a lovely shine but that doesn't show up too well on the pic. I've added die cut flowers (tattered florals) again coloured with the same PanPastel colours, a button, some twine and die cut leaves. In line with our theme I added a couple of tassels and 2 die cut borders.

I'm entering this card in the following challenges:
Cheerful Stamp Pad: Birds of a feather
Crafty Catz: buttons and bows
Incy Wincy: Bold and bright
Moving Along with the Times: things with wings
My time to craft: Your favourite embellisment
 (I adore tassels on cards but i'm very mean with them so don't use them too often lol)
There she goes: Scene of back to nature
TCP Tuesday: Embossing
Totally Papercrafts: Make your own flowers

I hope you're going to join our challenge again this week, don't forget our lucky winner gets an amazing prize, our lovely sponsor Berni from Your Creativity Store will be providing a trial set of PanPastels for this weeks winner


Thanks for calling by today
Claire xx

Saturday, 21 January 2012

Caroline's fab candy

My friend Caroline has a new blog for her gorgeous rubber and digi stamps and to celebrate she has some yummy candy up for grabs!
Aren't these stamps gorgeous??


I adore paint fusion so I'll be sat with my fingers crossed that i'm the lucky winner lol. Pop over to 
become a follower and find out how to enter.
hugs
Claire xx


GDT at Sugar Creek Hollow

Hi there, I'm so excited to be GDT at Sugar Creek Hollow for this weeks challenge, its a real pleasure to join such a talented team of ladies. I always admire their beautiful shabby chic and vintage projects so it was such an honour to be invited :-). This week's theme is 'Go Girly' and one lucky winner will receive a digi stamp of our choice and a winner's badge to display on their blog. In addition, the Design Team will choose one project as Card of the Week, the creator will receive a badge and be in the running for a Guest Designer spot!


For my GDT project I've used a gorgeous stamp from Crafty Individuals (a birthday pressie from my lovely MIL and FIL). I stamped the image with sepia versafine and watercoloured with distress inks (Tea dye, Vintage photo, Victorian Velvet). I made the background by stamping words onto card stock with distress inks, coating with gesso and then overlaying scrunched up tissue stamped with text stamp (from Chocolate Baroque's Paisley Elephant stamp sheet). To create the edge I cut the tissue paper larger than the card and once it was dry, ran a wet paint brush around about 1/2cm from the edge, this lets you tear the tissue in a straightish line but leaves a lovely feathery edge.  I've also added stitching with shimmery embroidery floss. 

I've gone to town with lots of girly embellies, pearls, iridescent gems, seam binding ribbon, lace, irridescent beaded trim and some lovely sparkly pins from Crafty Boots. The sentiment stamp is from Chocolate Baroque. I've added some hand made flowers too, rolled ribbon roses and the larger flowers were created with crinoline fabric from Linda, The Funky Junkie's Etsy store. I die cut the fabric using Crealies dies, coloured with Victorian velvet distress ink and scrunched up to dry. Once they flowers were dry, I layered them up and added iridescent seed beads to the centre. The punched leaves are made from kraft glassine.

The shimmery heart was made using a technique I saw on the Particraft blog,  (I think its on Sue's dvd too). This is the first time I've used it but definitely not the last as its so easy and really effective. To get the heart shape I stamped a heart stamp on some scrap card, cut out the shape and then spread pva glue over the reverse of the shape.  I added a good dusting of mica powders in pink and pearl and then blasted with my heat gun.  

I'm entering this card in the following challenges:
Clearly Inspired: Pastels
Crafters Companion: love is in the air
Crafty Creations: Valentine
Crop Stop: Distressed vintage or shabby
I brake for challenges: Fancy folds
Pretty Little Ribbon Shop: Be my valentine
Scrapbook Sisters: Sweet Valentine
Simply Create Too: love is in the air
Totally Papercrafts: Make your own flowers
Wags'n'Whiskers: Valentine/love


Thanks for calling by today. I hope you're having a good weekend
hugs
Claire xx


Friday, 20 January 2012

Whats new pussycat?

Hi there, well its Friday already yippppppeeee and time for a new challenge from Crafty Ann's and this time the theme is 'What's new pussycat?' As always there is a fab prize from Crafty Ann's Digi Shop for our lucky winner.  


I've used elements from Crafty Ann's new digi collection called 'Sweet Sage', aren't they the most gorgeous colours?? I've layered them digitally to create this card. As I'm a total numpty when it comes to digital crafting so I'm really happy I managed to create this. I printed the digi sheet off and matted it on some gold textured card, adding some dew drops in the corners. I printed out a couple of Crafty Ann's gorgeous metallic butterflies and coloured them with sakura stardust pens. I haven't used these pens for ages and I'd forgotten how beautiful and sparkly they are. Once I'd cut the butterflies out I popped them on to the card with some silicone blue. With the digital layering this card was sooooo easy to make,
 I kind of felt like I'd cheated lol.

I'm entering this one in the following challenges:
Crafty Purple Frog: anything goes
Dream Valley: anything goes
Flutter by Wednesday: Open challenge with a butterfly angel or fairy
Lollipop Crafts: No embellishments
Moving Along with the times: things with wings

Thanks for popping by. i've been a bad blogger again this week and haven't had chance to do a lot of visiting. i've a good excuse though, the little charity i work for has had the chance of some extra funding so i've been up to my ears in planning a new project. :-) 
Claire xx

Thursday, 19 January 2012

All about me at Sarah Hurley Challenge Blog

Hi, back again with my second post today and this one is my DT project for Sarah Hurley's Challenge Blog where Nat has set the challenge this time around. The theme is 'All about me' and Nat wants to see us celebrate  ourselves! Now this one really made my poor little brain cell struggle. I work for a mental health charity and have done lots of groupwork about positive thinking, I came up with the brainwave of creating a journal to record positive 'stuff' about me.


I began by carefully removing the cover from the journal (actually a 99p notebook from the Works) and covered it with white card. I had planned to used some of Sarahs gorgeous papers from Tinseltown but my printer has been playing up (my fault I jammed it up trying to print on thick card eeeek). I created the background with distress inks, painted with watered down gesso and then misted with glimmer mists. Next I used a Tattered Angels flourish mask and sponged green PanPastel ovet it.  I stamped with  dandelion clocks from Chocolate Baroque, stars (from Stampotique) and a couple of my favourite sentiment stamps (serendipity by Stampers Anonymous) and a wood mounted stamp that reads 'Be the change you want to see in the world. The world Serendipity is embossed with clear sparkle EP and the stars are painted with glimmer mists.

I found some scraps of my favourite papers from Sarah's  Tinseltown cd (available here!!)and paperpieced the fairy from Stampers Anonymous. It looks a bit weird in the pic as the dress is a solid stamp so I stamped and embossed with clear sparkle EP and its reflecting the light in a really strange way lol. I was tempted to swap the fairies cute little face for my mugshot but gave up on the idea lol

Now for the scary bit lol, I painted white acrylic paint where I wanted to write and added the text with a fineliner pen. One of the group activities we use it to create an acronym of our names using positive words so I decided to add that to my journal cover.

I really enjoyed creating this so think its a project I that I can tempt our craft group with at work, if I ever get through the mountains of paperwork in my office that is.
I'm entering this project in the following challenges:

CD Sunday: enchantment
Fabulous Friday: use paint
Hooked on Crafts: try something new
Little Claire's: Anything but a card
Simon Says Stamp and show: anything but a card
Totally Gorjuss: use a star
Through the craftroom door: Anything but a card
Try it on Tuesday:do you believe in fairies

Thanks for calling by
Claire xx


Year of the Dragon at Rainbow Lady's Challenge

Get your sunspecs out as this card is a bit on the bright side lol. Our challenge this week at Rainbow Lady's Challenge is 'Year of the Dragon'. I was tempted to go all oriental for this one but then I decided to use this cute little dragon stamp instead.

The stamp is 'Dragon Luck' by Lisa Victoria from Sweet Pea Stamps. I've coloured him with promarkers and inked around the edges with distress ink. I've used a background made with lime green cosmic shimmer mist, which I brayered (with an old hard rubber brayer not my trusty speedball lol) to create the texture. I've also added a panel of cuttlebugged card again inked with distress inks. To finish off I've added some lime green scrunchy ribbon, a couple of fabric flowers and a button.

I'm entering this card in the following challenges:
Catered Crop: buttons
Crafty Catz: Something new
Delicious Doodles: All things new
Deep ocean: sparkling and/or glitter
Emerald Faerie Garden: Green and gold/yellow
I love promarkers: anything goes
Marks Finest Papers: border punches
(my embossing folder was a Christmas pressie from my lovely friend Ann)
Stamptacular Sunday: texture
Truly Scrumptious: something forgotten (my dragon stamp)

Thanks for visiting today
Claire xx


Wednesday, 18 January 2012

Challenge 18 at Christmas Challenge [with sketches}

Hi there, another challenge at Christmas Challenges {with sketches} already, and this time we have a fab sketch by the lovely Janneke (pop over to the challenge blog to see the sketch)


We have a fab prize up for grabs too, we're sponsored by Judikins so our winner will be in for a treat!


For my DT card I've used backing papers from an Anna Griffen kit that I seem to have had forever. I've edged all the papers with a gold krylon pen and added a strip of green card punched with a MS border punch. The image is 'Home for the Holidays' by Katerina Koukiotis from Sweet Pea stamps. I love this image, she is such a gorgeous old fashioned girl.  I've coloured her with promarkers and added snow with a white gel pen. The image is matted on a couple of Marianne die cuts. I've added some gorgeous red and gold ribbon from Crafty Ribbons to finish off.

I'm entering my card in the following challenges:
Crafty Emma's : Vintage Dahling
Dream Valley: anything goes
Fussy and Fancy: let it snow
Gingerloft Challenge: anything goes
Incy wincy: bold and bright
Polkadoodles: Vintage/retro
Shopping our Stash: across the border
Stempelsonnen: Winter


Thanks for visiting today
Claire xx


Sunday, 15 January 2012

A postcard from Spain

Hi again, my third post today but I wanted to sneak in my project for Darcy's postcard challenge (pop over to her blog Art and Sole to find out all about it). This week we're making postcards from Spain. I'd planned a quiet weekend tucked away in my craft room but as usual things didn't go to plan and I had to grab a crafting fix this afternoon to make my postcard

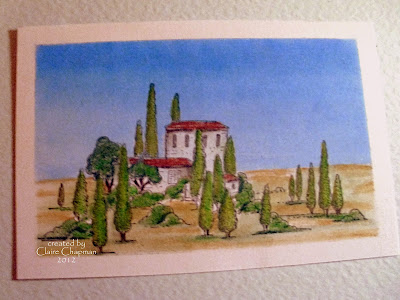
Here's the front, I masked the edges of the card and stamped the image (from Chocolate's Baroque's Echoes of Italy stampsheet but it looks a bit Spanish lol). I added the sky with PanPastels and then rubbed out the colour from the stamped image and used Derwent Pastel pencils to colour the image.


On the back I've used Chocolate Baroque's mail art stamps  and perforated postage paper.


It looks as though Jonathons brother romance is going more smoothly than his. I wonder if the young lovers will soon be reunited? I'm loving this challenge, there are so many fascinating stories developing, with all manner of romances developing and even dogs and fairies sending cards lol. I wonder if any of our travellers paths will cross en route ? I can't wait to get home from work tomorrow and find out how everyone's stories are developing

Right I'd better get to bed as its work in the morning. 
Thanks for visiting today
Claire xx

Anything goes at PanPastels

Woo hoo, our first challenge at PanPastel UK Challenge Blog and our first challenge is a really easy one for you: Anything Goes! There is a fab prize of a PanPastel trial pack up for grabs from our generous sponsor 'Your Creativity Store'. I was soooooo excited to be chosen for the PanPastel DT as I'd been itching to have a play with such an exciting new product and I've got to say they are a-ma-zing!  I'm still very much a beginner but i'm looking forward to sharing my journey into PanPastel Land with you lol.


Here' is my first DT project, I wanted to create a misty winter scene and set to copying a pic from a Christmas card. I started by covering the card with White PanPastel and then added the sky, using streaks of  Red Iron Oxide, Dairylide Yellow and black. I then blended it all with more white using a Sofft right angle slice. The tools for applying PanPastels are wonderfully squidgy and the colours blend beautifully. 

I added more black to create the shape of the houses using a Sofft knife with a pointed cover and ....now comes the good bit lol. To create the houses I just rubbed the PanPastel out where i wanted the snowy roof to be! I'm thoroughly over excited about the fact that you can use an eraser with PanPastels, its so much easier than masking and also means you can create so many different effects. I added the 'river' with more black PanPastel and then added detail with stamps.

The spruce trees in the background were made with Clarity stamps, and I actually used black PanPastel to stamp them. For the trees in the foreground and the birds I used stamps from Andy Skinner and Memento Tuxedo Black ink. I've found dye ink much better for stamping on PanPastel backgrounds than Versafine or Stazon as they seem to disappear into the background. To add to the frosty feel of the scene I added glamour dust to the tree branches and foliage in the foreground.

To finish off I've matted the scene on yellow card, then charcoal grey card and added some sparkly silver foliage, wooden and silver berries and some grey organza ribbon.

I'm entering this card in the following challenges:
Cheerful Stamp Pad: Let it snow
City Crafter: Back to Black (use a silhouette)
Craft a Scene: anything goes with a scene
Crafty Creations: Something new (my PanPastels)
Gingersnap Creations GC 133: use a set/line of stamps (I've used Andy Skinners stamps, Back to Nature set)
Sparkle Creations Rubber Stamps: something  new (PanPastels)
Tuesday Throwdown: Baby its cold outside


 I hope you're going to join our first challenge, you don't have to use PanPastels to enter but of course we'd be chuffed if you did. Our lucky winner will receive a trial pack of PanPastels and be able to have a play
Thanks for calling by
Claire xx


Butterflies or Bugs at FSC

Hi there, we're back on the catwalk with a new challenge at Fashionable Stamping Challenges and this fortnight our theme is 'Butterflies or Bugs'. As always we're sponsored by the lovely Marina from Cottage Crafts who is offering a fab prize for our lucky winner. You may need your sunspecs for my DT card lol


I've created the background with PanPastels using white and yellow applied with a sofft sponge and given a quick spray of cheapie hairspray to fix. Next some splodges of acrylic paint, once this was dry I added some 3d stencil paste through some sequin waste and coloured with yellow mica powder. The bees are from  one of the Sheena Douglass paint fusion sets, they've got glamour dusted wings and yellow viva gloss gel on their bodies. 

The butterflies were created using some of my old favourite butterfly stamps from Chocolate Baroque (Butterfly Bliss and Just Butterflies). I stamped the butterfly silhouette with London Fog memento ink, cut out and coloured the back with yellow PanPastel. I used the detailed butterfly stamp with black stazon on Clearly for Art film, cut them out coloured the reverse with alcohol inks and heated them so I could curl the wings. I added Ranger black enamel accents to the butterfly and attached them with silicone. The tiny white 'pearls' were made with a Viva pearl pen. To finish off I've added some lace, yellow chiffon ribbon and a silver bee charm.

I'm also entering this card in the following challenges:
Crazy Challenge: Lace and or pearls
Fabulous Friday: use paint
Flutter by Wednesday: bright colours
Gingersnap Creations: (GC 132): Soft yellow and white
Make My Monday: Nature/animals
Shopping our Stash: glitter sparkle or shine

Thanks for calling by. 
Claire xx

Thursday, 12 January 2012

The Many Faces of Women at Rainbow Lady's Challenge Blog

Hi there, well another week has flown past and its Thursday already. I've been feeling a bit sorry for myself this week as I've had a cold and earache, but I'm soldiering on fuelled by lemsip and vitamin C and the weekend will soon be here yipeeeeee. This week at Rainbow Lady's Challenge our theme is 'The Many Faces of Women'. I've used a gorgeous stamp by La Blanche for my DT card. 


I've simply inked the stamp with Memento Tuxedo black in and stamped the image on some white silk card,matted on some black card and AB gems in teh corners. The background was made using a gorgeous leaf stamp from Chocolate Baroque's Essence of Nature stampsheet. Again stamped on white card and then gently inked with black ink and matted on black card. I've just addded a little ribbon to finish off.

I'm entering this card in the following challenges:
Crafty Cardmakers: No floral embellies
Crafty Emma's: anything goes
Stampalot Challenge: Monochrome
Stamp and Create: anything goes

Thanks for popping by
Claire xx

Saturday, 7 January 2012

On our travels with Darcy's postcard challenge

As soon as I heard about Darcy's Post Card challenge over at her blog Art and Sole, I was totally intrigued by the idea and had to play along. I love mail art so I couldn't resist, its a fantastic challenge that involved making a postcard each week for 52 weeks. I won't give you all the details, you can visit Darcy's blog and find out all about it, click the button in my sidebar for all the details. I haven't had much time for crafting but managed to make this quick postcard from our first country 'Austria'


My characters are Miss Rosemary Wilton, aged 17 and her sweetheart Mr Jonathon Baker aged 18. Their romance is set in the early part of the 20th century. The course of true love never runs smoothly and the young couple have been sent their separate ways by their parents in an attempt to end their budding romance. Their homes are in the same village in a quiet rural area of England and to avoid their parents finding out that they are communicating, they are both writing to Rosemary's older sister's address.  Rosemary is travelling with her Aunt Mabel and Jonathon has been sent on an extended trip with his older brother James.  Rosemary and James are hoping that they can engineer thing so that their paths cross and they can be reunited.
Ahhhh how sweet! Watch this space though as hopefully they may have some adventures along the way lol.

I've made a quick postcard using my new Winter distress inks and Clarity stamps create a snowy landscape that I  cut with nesties. I created the 'stamp' for the back with perforated postage paper and the same inks/stamps. Now I've just got to get myself organised and make a book to keep them all in :-)

Thanks for calling by, are you tempted to travel along with Darcy's challenge?
Hope you're haivng a good weekend so far. I've been a real lazy bones today in fact I'm sooooooo lazy we've cancelled going out this evening in favour of phoning the local chinese for a home delivery yum scrum!!
Claire xx


Related Posts Plugin for WordPress, Blogger...