My lovely blogland friends

Showing posts with label WOW EPs. Show all posts

Friday, 20 October 2017

Nature's Peace from Chocolate Baroque

Good morning folks, this card features stamps from Nature's Peace from Chocolate Baroque. I wanted to create a sunny Autumn scene.


 I began with a PanPastel background and stamped the tree using brown ink, the foliage in the top corner with green ink and then stamped the foliage in the foreground with a dark green ink, over stamping with the berried inked in red ink. The sentiment was stamped and embossed with a vintage gold ink.

I'm entering this card in the following challenges:

Artistic Inspirations: Anything goes
Love to Craft: Anything goes
Paper Shelter: Make it square
Sparkles Forum: Autumn colours
The Crafty Addicts: Anything goes autumn colours

Thanks so much for visiting today, hope to see you again soon
Claire xx

Sunday, 8 October 2017

Fantasy Woodland

Good morning folks, today I'm sharing a little Autumnal canvas made using stamps from Chocolate Baroque.


  I began with a brusho background and then stamped the trees (from  Fantasy Woodland) and embossed with gold embossing powder. I added some little dots of clear glue and created some foliage with beadazzles.

Next I took some brown acrylic paint and grounded the trees. Once that was dry I stencilled in some leaves using green acrylic paint and the Useful Leaves stencil. Next I added some falling leaves using the Seasonal Elements stencil and the word Autumn using the Seasonal Journey stencil and iridescent paste. Once the paste was dry I coloured the leaves and word with alcohol markers.

I'm entering this project in the following challenges:

Allsorts: Trees/Leaves
Creative Artiste: Anything goes
Noor Designs UK: Fall colours
Thats' Crafty: Forever Autumn
The Crafty Addicts: anything goes autumn colours

Thanks so much for visiting today, hope to see you again soon
Claire xx


Monday, 24 July 2017

Winter Solstice from Chocolate Baroque

Good morning folks, a quick post before I dash off to work as I wanted to share this project made using stamps and stencils from Chocolate Baroque.


 I began by stamping 
Winter Dawn onto white car and coloured her with Graph'It Markers. I outlined the image with a black marker annd then applied black gesso all round and then added some colour using Twinkling H2O paint in blued and purples. I stamped the image again on acetate using versmark in and embossed with a sparkly white powder. I cut the snowflakes out and layered them up over the image. I added a little glue and glitter too give some more dimension.


 I added some stencilling around the image using the Seasonal Elements stencil and glassy gel medium, sprinkling with more glitter while the medium was still wet. The colours of the paint have bled through this while it was drying, a happy accident as I love the effect!  I applied clear versamark ink through the stencil to create the wording and embossed with Icicle WOW EP. I layered the focal image up one some corrugated card that I'd painted with black gesso and highlighted with a little silver gilding wax. I added a little scrap of ribbon and a snowflake embellishment to finish off.

I'm entering this project in the following challenges:

4 Crafty Chicks: Blue Christmas
Christmas at Sweet Stampin: Anything goes for Christmas
Frilly and Funkie: Christmas
WOW embossing powder: Anything goes with EP

Thanks so much for popping by, hope to see you again soon
Claire xx

Saturday, 10 June 2017

Patchwork Butterflies from Chocolate Baroque

Good morning my lovelies, I've been chasing my tail for the last few weeks, work seems to get busier and busier! Anyway this morning I'm sharing a project made using the lovely Patchwork Butterfly stamp set. I love these stamps, they are so versatile.


To make the necklace and earrings I stamped the largest butterfly and the smaller coordinating butterfly on shrink plastic using Gold Stazon ink. I coloured the back of the butterflies with alcohol markers and cut them out. I punched holes for the jump rings using a crop-o-dile using the largest punch as the hole will shrink when heated. I heated the butterflies to shrink them, the largest one was flattened with an acrylic block but I curled the wings of the smaller butterflies while they were still warm. I added some beads from my stash to complement the colours of the butterflies.


I recycled a gift box to put the little butterflies in. I covered the box with some paper that I'd coloured with dye inks and mica sprays, crumpled and left to dry. I highlighted the texture with gilding wax and added some stencilling with gold texture paste. The butterfly was stamped on acetate and embossed with gold.

I'm entering this project in the following challenges:

Artistic Stampers: winged things
Creative Artiste: Anything mixed media goes
Dragonfly Dreams: add sparkle
Frillie and Funkie: Something old (recycled gift box)

Thanks for visiting today, have a lovely weekend
Claire xx

Sunday, 28 May 2017

Anything Goes at We Love 2 Create

Good moring folks, I've been having a play with my PanPastels and paints to make this journal page for our 'Anything Creative/Mixed Media Goes' challenge over at We Love 2 Create. As usual there are some lovely crafty goodies for our lucky winner thanks to our sponsors Premium Craft Brands and of course there's Top 3 honours up for grabs too!

I wanted to create the look of weathered copper for this page so mixed lots of  beautiful PanPastels quite randomly for my base layer (you can find links to the colours I used at the bottom of this post). Next I mixed some copper acrylic paint with Glassy Gel Medium and applied through a stencil. Once that was dry I applied a bit more PanPastel and then wiped most of the colour off the stencilling. Glassy gel medium is about the only thing I've found that gives a good resist effect with PanPastels.


It kind of started to go wrong from this point as I decided to add some of the beautiful Steampunk Cogs from Stamperia. I've never used these before and they are so lovely but they are on rice paper which I thought would kind of disappear like tissue does. Unfortunately it doesn't! I carefully tore around the images and applied with matte medium and was left with a white feathery border around the image  - not the look I was after at all so I just kind of went over them with PanPastels to try and blend them in a bit. I'll have to remember to cut the images out of the rice paper next time.

I dabbed versamark ink here and there and used some WOW Verdigris EP  to create some more weathered texture, I love this stuff, it looks fab in real life.

The butterfly is from Chocolate Baroque, stamped with versamark on acetate and them embossed with WOW Copper EP. I cut the butterfly out and coloured the back with alcohol inks. I used silicone glue to give the butterfly a bit of dimension.

I'm entering this project in the following challenges:

A Inky Mess: Anything Mixed Media Goes
Dream Valley: things with wings
Let's craft and Create: make your own background
WOW Embossing Powders: anything goes with WOW EPs

Thanks so much for visiting today, hope to see you again soon
Claire xx

Friday, 5 May 2017

Anything goes at Polkadoodles

Good morning my lovelies, we've got a new challenge starting over at Polkadoodles and of course our theme is 'Anything Goes'! There is a lovely prize from Polkadoodles for our lucky winner and loads of inspiration from my teamies too! The DT were challenged to use a die cut for this challenge and that was a real treat as there are so many gorgeous Polkadoodles dies to choose from.


 I've used stamps from the beautiful Bella Fleur A5 Clear stamp set to create this little wildflower meadow. I stamped the images with versamark on watercolour paper and embossed with white embossing powder before watercolouring with distress inks. The butterfly is from Belle Papillon Stamp Set and I've used the matching Butterfly Doublet Die to create the butterfly using acetate and glitter on the back. The frame was from the pound shop, it was a bit of a bright colour so I painted it with white gesso and popped my little scene in the frame.

I'm entering this project in the following challenges:
Artistic Stampers: Floral Fantasy
As you like it: Favourite die and why
 (my favourite die is this lovely butterfly die from Polkadoodles, its great to use on it's own but even prettier with the matching stamp)
Country View Crafts: Flower Power
Die Cut Divas: Flowers
Little Miss Muffet: Anything goes

Thanks so much for visiting today, hope to see you again soon
Claire xx


Saturday, 29 April 2017

Stampbord domino book

Good morning crafty friends. It's my turn to share a project over on the Chocolate Baroque DT blog and today I'm sharing a little book made for the launch of the Russian collection stamps and stencils. You can find them all here


I made the covers from Stampbord dominos, I love stampbord as it takes ink beautifully. I stamped the little skyline from Babushka and added colour with Sakura Stardust pens and a water brush. Once that was dry I added some gold embossing and some glossy accents. I also embossed around the edges with WOW Gold EP


To make the concertina pages I cut a strip of card to size and folded it to fit the stampbord covers.  I stamped  the Silhouette Palaces with versamark and embossed with black EP. I then used Twinkling H2Os to paint in the sky before adding a few stars, white highlights to the towers and a little moon with silver paint.


I'm entering this project in the following challenges:

Addicted to Stamps: not a square card
An Inky Mess: Mixed Media
Lemon Shortbread: Anything goes
Simon Says Stamp: Anything goes

Thanks so much for visiting today, hope to see you again soon
Claire xx

Sunday, 16 April 2017

Beautiful Katya

Good morning my lovelies, long time no see! I've been without internet for a wee while but eventually Virgin media have sorted the problem and so I'm playing catch up now. My project today features the lovely Katya from Chocolate Baroque.


To decorate the plastic frame I applied gilding glue and then adding gilding flakes here and there and dusted mica powders over the rest.

I created a background with distress inks (bundled sage, Wilted Violet and Shaded Lilac) and overstamped using the Large Crackle Background stamp using purple chalk ink. I stamped Katya onto white stamping card and coloured her with alcohol markers. I also stamped her onto acetate with versamark and embossed with Gold Embossing Powder. I then cut Katya out and glued her to the background. I then cut her headdress out from the acetate and layered that up with tiny blobs of silicone glue. I added a few little gems here and there.


I then stamped the sentiment (from Artistic Expressions) with purple chalk ink on some gold vellum. I tore the strip out and rolled the edges around a cocktail stick to make a little scroll.

I'm entering this project in the following challenges:

Creative Artiste : Anything Mixed Media
Tuesday Throwdown: Something clear
WOW Embossing powder: Anything goes with embossing powder

Thanks so much for visiting, hope to see you again soon
Claire xx

Wednesday, 15 February 2017

Chocolate Baroque Colour Challenge

Good morning folks, we've got a new challenge starting over at Chocolate Baroque Challenge and as always we've got a gorgeous colour palette to inspire us, a fab prize for our lucky winner and lots of inspiration from my lovely teamies too!


I've made a steampunk inspired tag using the challenge colour palette and some of my favourite Chocolate Baroque stamps.


I began with a tag and mopped up lots of  Lucky Shamrock Green Starburst Stain. This wasn't so lucky for me as I managed to spill the pot all over my craftroom lol. I stamped the sentiment from Artistic Affirmations and the lacy border which is from Lace Fragments with versamark ink and embossed with a WOW sparkly copper EP. I also swiped around the tag very roughly with Copper metallic paint and a credit card, adding a little copper EP and heating for some texture. The gorgeous butterfly is from Steampunk Butterfly, again embossed with Copper EP but this time on acetate. I cut it out and coloured the back with green and turquoise alcohol inks. I've added a little ribbon and a brad to finish off.

I'm entering this project in the following challenges:

Crafty Cardmakers: add some texture
Daring Cardmakers: mirror mirror (shiny/reflective)
My time to craft: anything but a card
Penny Black and More: use your stamps
Simon Says Stamp Monday Challenge: Favourite tool (heat gun)
Try it on Tuesday: Let's get messy

Thanks so much for visiting today, hope to see you again soon
Claire xx

Wednesday, 16 November 2016

November Colour Challenge at Chocolate Baroque

Hi there folks, how's your week going? It's manic at work as always these days and I don't have a lot of time for blogging and definitely not enough time for crafting. I'm an optimist though so hopefully it won't be too long until I win the lottery and become a lady of leisure lol. Anyway back to crafting and my project today is for our new challenge over at Chocolate Baroque where we have an autumnal colour palette based on a card I made ages ago.


I've used the colours to make a poppy themed birthday card


I began with a distress ink background, using scattered straw, barn door, peeled paint and gathered twigs and then overstamped with stamps from Nature Fragments. I love these stamps and the 'tree rings' are so useful for backgrounds. I stamped the poppy stamp with Potting Soil Archival Ink and then used a waterbrush to remove some  of the colour before painting in reds and greens with more distress inks. I added some shading with Lyra Pencils. I stamped the sentiment with versamark and embossed with gold EP.

I'm entering this project in the following challenges:

Anything but cute: An autumn day
Wonderful Wednesdays: Anything goes
Paradise of Stamps: Anything goes
The Sisters of Craft: Anything goes

Thanks so much for visiting today, hope to see you again soon
Claire xx

Wednesday, 28 September 2016

Chocolate Baroque Colour Challenge

Good morning folks, how's your week going? It's week 2 of our monthly challenge over at Chocolate Baroque Challenge Blog and we've got a beautiful colour palette to inspire you. There's a fabulous prize of a voucher to spend at Chocolate Baroque and top 3 honours are up for grabs too.


I've made a quick Christmas card using colours inspired by this month's inspiration pic


I began with distress inks and blended them to create an ombre effect. I used Tumbled Glass, Broken China, Stormy Skies, and Chipped Sapphire. Once the ink was dry I stamped the edges using stamps from Winter Edges using versamark and heat embossed with a sparkly white WOW embossing powder. I heat embossed the sentiment and added some falling show with a White Graph'It Shake pen.

I'm entering this card in the following challenges:

Dragonfly Dreams: monochromatic
Crafty Hazelnut's Christmas: Use a sentiment
Get Creative: Embossing
WOW Embossing Powder: Anything goes with embossing powder

Thanks so much for visiting today, hope to see you again soon
Claire xx

Sunday, 11 September 2016

Texture at Chocolate Baroque

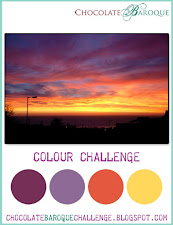
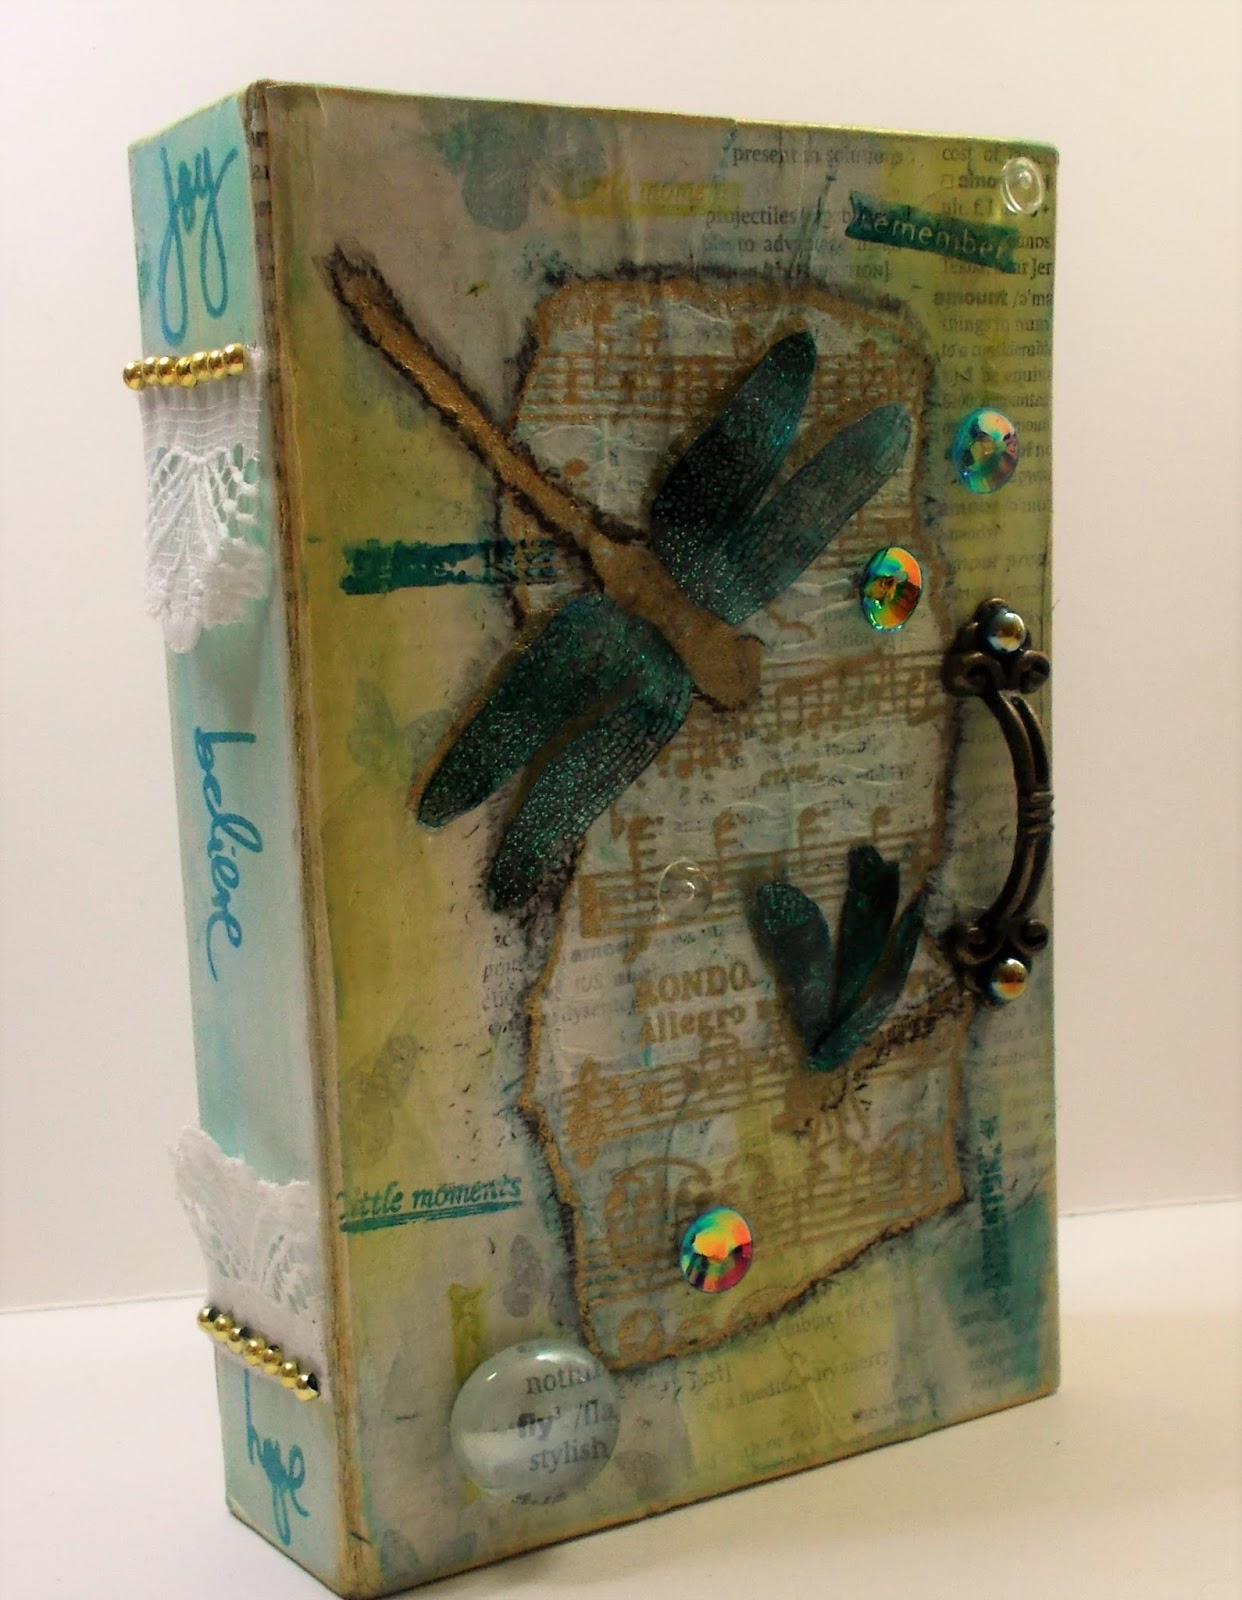
Good morning folks, it's a bit like a bus stop here this morning as I haven't posted all week and now I've got 3 posts in one day lol. Over at Chocolate Baroque, our theme this month is texture and the DT are all showcasing some of their favourite stamps and sharing lots of techniques that you can use to create texture on your projects. For my second DT project I've altered a little gift box and used Key to my Dreams A5 Stamp Sheet.

I began with a coat of black gesso and once that dried I added lots of different die cuts from my stash. I wasn't fussy about the colours as once they were stuck down I gave them a coat of black gesso too. I created the lock and key for the front of the box by rolling out some paper clay and pressing the stamps into the clay. When you remove the stamp, the image is pressed into the clay creating lots of texture. I left this overnight to dry and then cut them out, painting them with black gesso.. The little frame is from the pound shop, again painted with black gesso


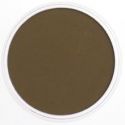
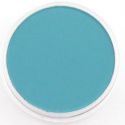
To create a kind of old metal with a little rust and patina I dabbed on various shades of paint. I used brown, orange, gold and copper, blending a little with a baby wipe. While the paint was wet I sprinkled in various embossing powders (copper, turquoise, gold and brown) and left it all to dry. Once it was dry I heated the embossing powder, I wasn't sure if this would work with the paint and it did bubble quite a bit but that just added to the effect. 
I stamped the sentiment onto a scrap of card that I'd used to mop up some of the paint and then assembled the box, adding a few highlights with gilding wax and a little black gesso to define the key hole.

I'm entering this project in the following challenges:

Altered Eclectics: Anything goes
A Vintage Journey: create within a frame
Sandee and Amelie's Steampunk Challenge: anything goes steampunk/industrial
WOW Embossing Powders: Anything goes with WOW powders

Thanks so much for visiting today, hope to see you again soon
Claire xx

Monday, 15 August 2016

Resist Stamping at Fashionable Stamping Challenges

Hello there folks, we've got a new challenge over at Fashionable Stamping Challenges and this month our theme is 'Resist Stamping' . As always my teamies have lots of inspiration for you and we've gto a lovely prize of a voucher to spend at Flonzcraft for our lucky winner so what are you waiting for?? We're a stamping challenge so no digistamps are allowed.


The ginormous  butterfly stamp is from Chocolate Baroque, stamped with versamark and embossed with clear embossing powder. Next I used a paintbrush to wet the background area and then lightly sprinkled on Brusho powders in shades of blue/green. I over stamped with a text stamp from Chocolate Baroque using white gesso and then back ink and doodles around the edges to give a faux stitched effect.

I painted the butterfly with distress inks and use Black Soot Distress ink well diluted to shade around the butterfly. The sentiment is also from Chocolate Baroque, for a change I stamped it randomly here and there.

I'm entering this card in the following challenges:
Allsorts: Butterflies
Artistic Stampers: anything goes
Crafting when we Can: Things with wings
Penny Black and More: anything goes with a stamp
Sweet Stamping: your favourite things

Thanks so much for popping by, hope to see you again soon
Claire xx

Sunday, 14 August 2016

Anything Creative/Mixed Media Goes at We Love 2 Create

Good morning my lovelies, how's your weekend going? It's chaos here as usual with our 9 month old puppy Benji causing mayhem and destruction. He likes to help when I'm crafting too and sticks his nose in to whatever I'm making, yellow paint on paws is not a good idea lol. Anyway back to business and this morning I'm sharing a project for our new challenge over at We Love 2 Create where our theme is 'Anything Creative/Mixed Media Goes'. You don't have to use our products to enter and we've got some lovely crafty goodies from Premium Craft Brands waiting for our lucky winner too!


I've altered an MDF Butterfly for this project, I began with a coat of white gesso and then applied Bright Yellow Green PanPastel. I used a Dutch Doobadoo stencil and added versamark with cut'n'dry foam before applying Bright Yellow Green and Yellow Green shade Pans. I cleaned the stencil and popped it back over to  use one of my favourite techniques for the background,.  I reapplied the stencil and them added Maimeri Glassy Gel Medium before removing the stencil and sprinkling over tiny microbeads


The flower and butterfly are both stamps from Stampendous, I used a sparkly EP and coloured with shades of Turquoise PanPAstels, adding little gems to the flower centres and layering them up with 3d foam pads. The sentiment is from Indigo Blu, stamped with Teal Zeal Memento Ink.
I added some gorgeous wired beads that I got in my January Craft Box

I'm entering this project in the following challenges:

Allsorts: Butterflies
Stamps and Stencils: time to take flight
Stempelgarten: Flowers/plants
That's Crafty: Zesty Zing

Thanks so much for visiting today, hope to see you again soon

Claire xx


Saturday, 9 July 2016

New stamps from Chocolate Baroque

Good morning my lovelies, today's share is a  wintery themed card using the beautiful new Tangled Birch stamp from Chocolate Baroque. This is such a detailed stamp and so versatile, I thought it would be a good opportunity to start my Christmas cards. Have you started yours yet?


I began by stamping the focal image on some stamping card and dusting distress ink (Spun Sugar, Tumbled Glass and Squeezed Lemonade) over with a shaving brush before distressing with Iced Spruce ink. I splashed the background with some water and blotted with some kitchen towel to create a snowy effect. I stamped the image on acetate with versamark, extending the land a little with a versamark pen  and embossed with a silver embossing powder. I layered this over the background, attaching with a couple of silver eyelets. and added some glitter to the moon using a Zig glue pen.

To make the background I used the same colours of distress ink and dusted them over a larger piece of card, trying to follow through the colours from the topper. The snowflakes are from Reindeer Landscape, stamped with Iced Spruce distress ink and then I've added dots of glue and sprinkled with glamour dust.


I've used some silver card from my stash to mat and layer the image and the background and added a silver bow to finish off. 

I'm entering this project in the following challenges:
ABC Christmas: N for no rules
Craft Rocket: anything goes
Crafty Boots: Christmas
Inky Chicks: Christmas in summer
Moving along with the times: no designer papers
Sisterhood of Crafters: make your own background

Thanks so much for visiting, I hope you're enjoying all the inspiration from my lovely teamies, over on the Chocolate Baroque DT blog, if you aren't a follower do pop over if you have time as there are new posts everyday and often lovely freebies too. 
Claire xx

Wednesday, 22 June 2016

Chocolate Baroque Colour Challenge

Good morning folks, its week 2 of our colour challenge over at Chocolate Baroque Challenge and this time around we've got a really gorgeous colour palette to inspire us. Of course there is a fab prize up for grabs, who can resist Chocolate Baroque goodies??

Current Challenge

Here's my DT project for this month's challenge:


I thought the colours would be perfect for a moody seaside scene so got busy with stamps from one of my favourite sets 'Seashore Scenes' and stamped in the scene.  I used Pebeo masking fluid to mask the lighthouse, sun, little boats etc and left it to dry. Next, I painted the scene with distress inks and added some waves with a white pen. The sentiment is from Seaside Dreams, stamped with versamark and embossed with white embossing powder.

I'm entering this card in the following challenges:
Addicted to stamps: Anything summer
Bunny Zoe's: Summer
Creaetive Knockouts: Summer fun
Inkspirational: Masking
Little Claire's: create a scene
Ooh La La: sun, sand, sea

Thanks so much for visiting today, hope to see you again soon
Claire xx

Friday, 3 June 2016

Tangled Baroque Ornament

Good morning folks, my project today is a little tag made with one of the gorgeous new stamps from Chocolate Baroque. This one is called Tangled Baroque Ornament but there are a whole selection of these beautiful mandalas, you can find them here.


I began with a piece of card from my scrap pile, it had a crackled background but I didn't like the colour so I recycled it by applying metallic acrylic paints and once they were dry I lightly applied some gilding wax to highlight the crackle.

I stamped the image four times and embossed with gold embossing powder and then painted them with distress inks (I used Peeled Paint, Forest Moss, Wilted Violet and Picked Raspberry). I cut the layers out and layered them up with 3d foam pads. To finish off I added some die cut swirls and a little scrap of rainbow ribbon attached with a brad.

I'm entering this tag in the following challenges:
A Beautiful Mess: Anything goes
Die Cuttin Divas: anything goes with die cuts
Incy Wincy: texture
Inspiration Destination: anything goes
Wonderful Wednesdays: anything goes


Thanks so much for visiting today, hope to see you again soon
Claire xx

Saturday, 7 May 2016

Chocolate Baroque on the Craft Channel

Good morning folks, a quick post to let you know that the lovely and very talented Lesley Wharton will be on The Craft Channel at 11am today with some gorgeous Chocolate Baroque stamps and Brushos too!  I'm just rushing off to do a little shopping so I'm back in time to watch, I love Brushos but I'm definitely a beginner with them so I'm looking forward to some tips from our Lesley!


This is one of my samples for the show. I had a play mixing Brusho's with white gesso for the background and used one of the fab wooden blanks from Chocolate Baroque. I slapped on loads of white gesso, misted with water and then lightly sprinkled on some crimson Brusho. I was really cool watching the brusho crystals reacting with the water and gesso. Once it was dry I added a little crackle medium and some more white gesso .

The tree stamp is one of my favourites, it's from the Glade A6 set or you can get a full A4 set of lots of gorgeous trees too . I love these stamps as they come with lots of different leaves, flowers etc so you can create you own tree and of course using different colours enables you to change the seasons. 
I stamped the tree on white tissue with versamark and embossed with Gold EP and applied it to the background with matte medium. I chose not to use any of the leaves but added dots of glue, glitter and mica flakes to my tree. The sentiment is another old favourite, from Chocolate Baroque, Words of Inspiration.

I'm entering this project in the following challenges:
Crafting with friends: Anything goes
Creative Fingers: Anything goes
Simply Papercraft: Anything goes
Southern Girls: texture

Well I'd better scoot off as the cupboards are bare and I don't want to miss the show!
Thanks so much for visiting today
Claire xx

Sunday, 24 April 2016

Anything Creative/Mixed Media Goes at We Love 2 Create

Good morning, it's challenge time over at We Love 2 Create and we've got an Anything Creative/Mixed Media Goes theme so it's a nice easy one for you to play along. As always we've got some lovely crafty goodies for our lucky winner, thanks to our generous sponsors Premium Craft Brands. 


I've had this box for ages, it was a gift box for a watch I received ages ago and it's been gathering dust for I thought I'd give it a bit of a makeover. I began with a coat of white gesso and then applied dictionary paper with matte gel medium. Once that was dry I coloured it with my PanPastels, you can find links to the colours I've used at the end of this post.


The focal image is from the Stampman, I stamped it on tissue paper with versamark and embossed with gold EP and applied it to my box with Matte gel medium. To give the wings a bit of extra sparkle I stamped the image on self adhesive sparkly acetate and applied PanPastels to the back of the acetate, you can see the effect a little better in this pic.


I added some shadows with Paynes Grey PanPastels and then stamped some words here and there with Memento Teal Zeal ink. I've added some embellishments that came in my monthly treat from Craft Box and a little lace and some faux gold pearls to the side of the book box.


I'm entering this project in the following challenges:

A beautiful mess: anything goes
Craft Rocket: Favourite colour combo
Crafty Catz: Add lace
Creative Fingers: Anything goes
Fab'n'Funky: Winged things
Frilly and Funkie: It's not easy being green
Sisterhood of Snarky Stampers: E is for embossing

Thanks so much for visiting today, hope to see you again

Claire xx

Related Posts Plugin for WordPress, Blogger...